Create Your Bot
This section is very important
Step 1: Create a Discord Bot
Go to the Discord Developer Portal and log in with your Discord account.
Click on the "New Application" button and give your application a name. This name will be your bot's name, so choose something related to BedWars1058, like BedWars Bot.

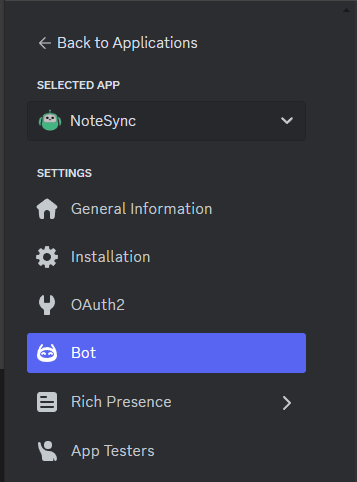
- Navigate to the Bot section on the left-hand side menu.

Step 2: Enable Privileged Gateway Intents
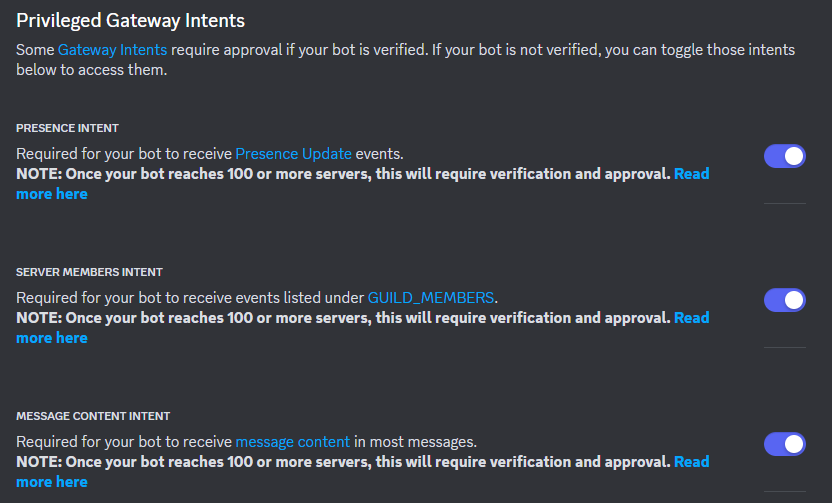
In order for your bot to work effectively with BedWars1058, you need to enable the following Privileged Gateway Intents: PRESENCE INTENT, SERVER MEMBERS INTENT, and MESSAGE CONTENT INTENT.
Enable PRESENCE INTENT:
- Go to the Bot section in the Discord Developer Portal.
- Toggle ON the Presence Intent option.
Enable SERVER MEMBERS INTENT:
- In the same section, toggle ON the Server Members Intent option.
Enable MESSAGE CONTENT INTENT:
- In the same section, toggle ON the Message Content Intent option.

Step 3: Add the Bot to Your Discord Server
Go back to the General Information tab in the Discord Developer Portal and copy your bot's Application ID. You'll need this to generate the invite link.
Generate an Invite Link:
- Replace
YOUR_CLIENT_IDin the following URL with your bot's Client ID: https://discord.com/oauth2/authorize?client_id=YOUR_CLIENT_ID&scope=bot&permissions=2146958847
- Replace
- Open this link in your web browser, choose your desired server, and grant the necessary permissions.
Step 4: Retrieve the Bot Token
- While still on the Bot section of the Discord Developer Portal, under the Token subsection, click on the Copy or Reset button to copy your bot's token. Keep this token safe and never share it publicly!
Congratulations! 🎉 You've now created a Discord bot and enabled the necessary Privileged Gateway Intents for the BedWars1058 Discord Addon. In the next steps of your guide, you can proceed to integrate the bot with your Minecraft server. 😄